MG Ads Detailed Developer Access Process
Introduction
This guide will detail the complete backend operation process of MG Ads, from developer account registration, app creation, ad unit configuration to release application, covering key links such as regional language settings, Microsoft Store app ID association, and ad type selection. Whether you are an individual development team or an enterprise, following this process can complete the basic configuration and lay the foundation for subsequent SDK integration and ad monetization. It should be noted that: before accessing products based on the Microsoft Store, you must first complete the UWP version porting to ensure compliance with platform adaptation requirements.
MG Backend Operation Guide
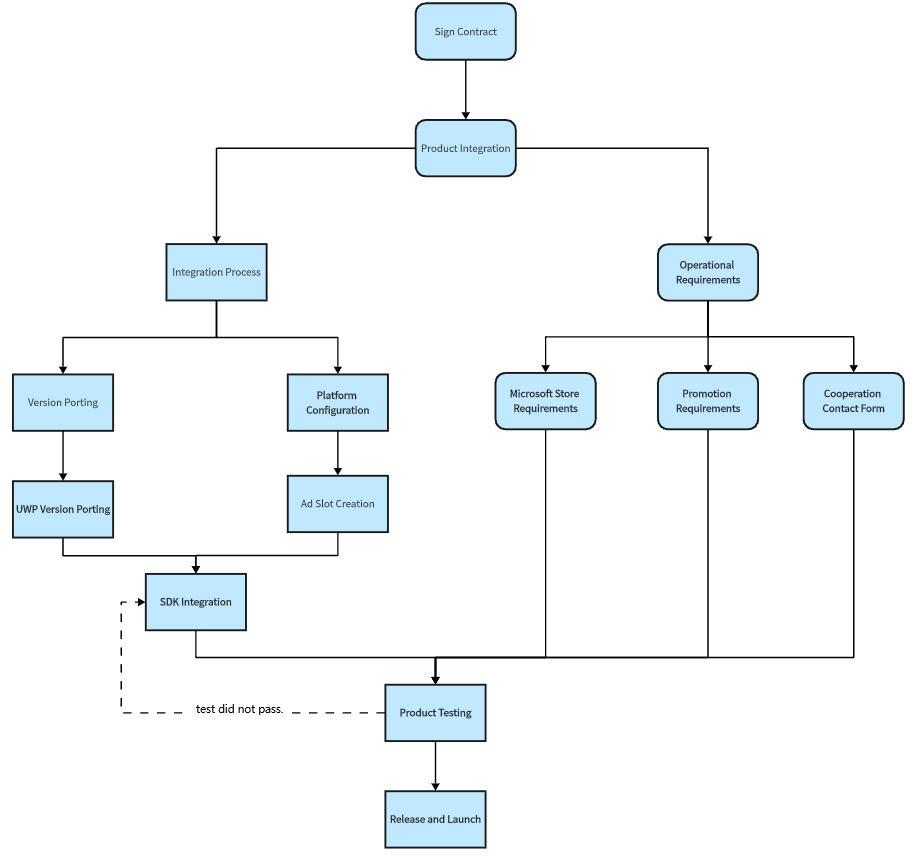
Creation Flowchart
Register a Miracle Games Developer Account
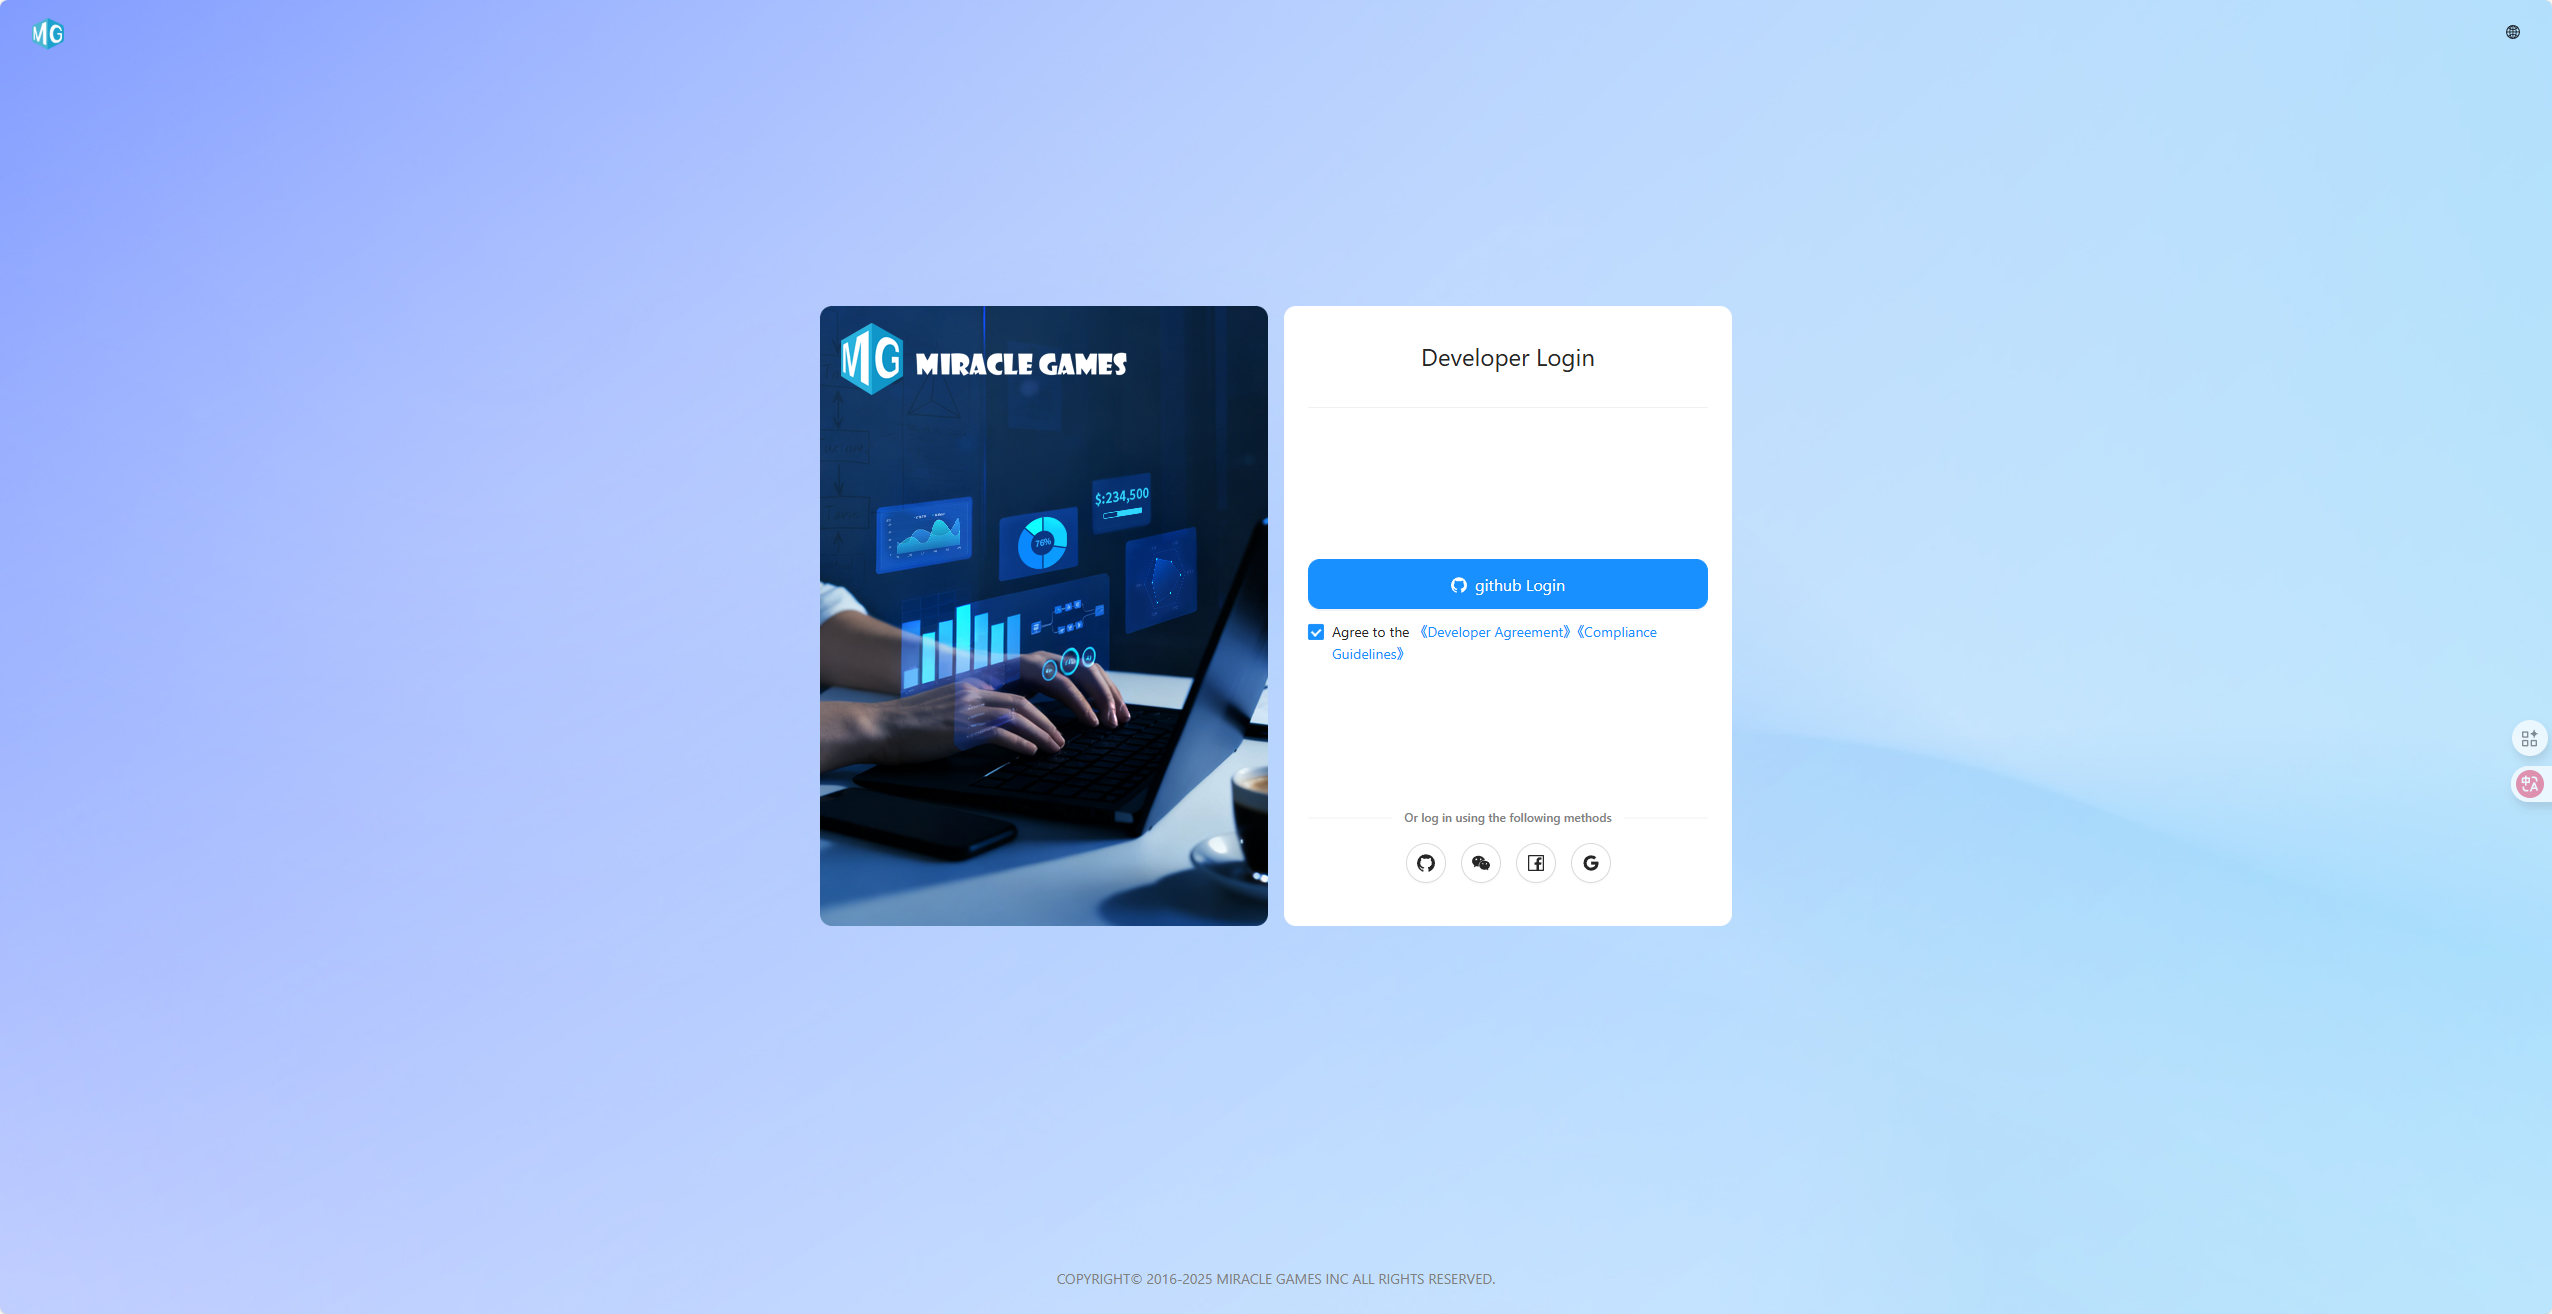
Step 1: Open the Miracle Games backend website ["Click to Enter"].
Step 2: Check "Agree to the "Developer Agreement" and "Compliance Guide," then you can choose third-party login methods such as Github.
Login methods via Facebook, Google, Microsoft, WeChat, etc., will be opened gradually.
Application Management - Create Application
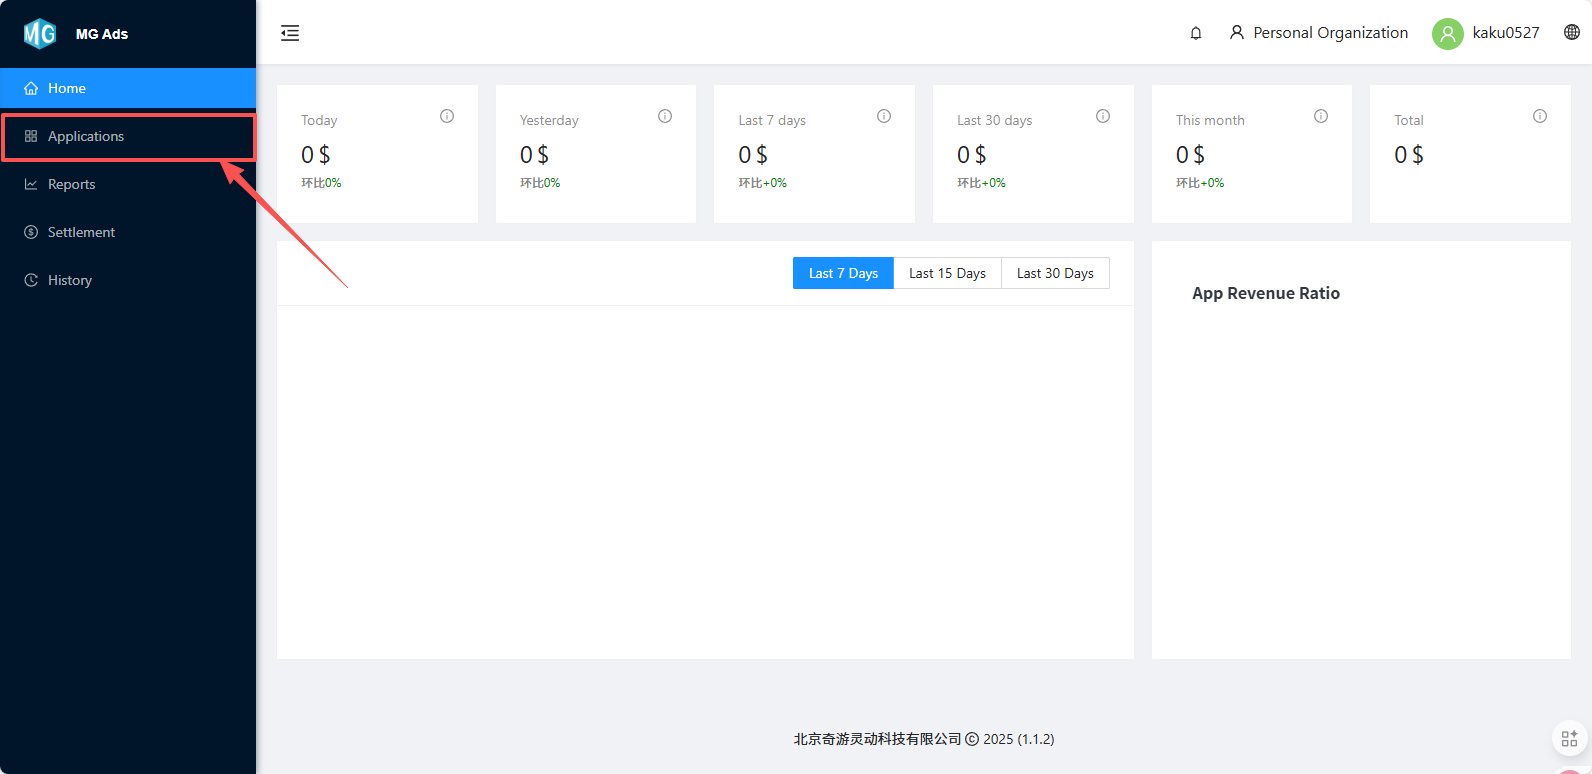
Step 1: After logging into the Miracle Games backend, select the "Applications" option.
Step 2: Enter the main interface of the ad backend - click on the Applications tab.
Step 3: Create Application - click "Create Application."

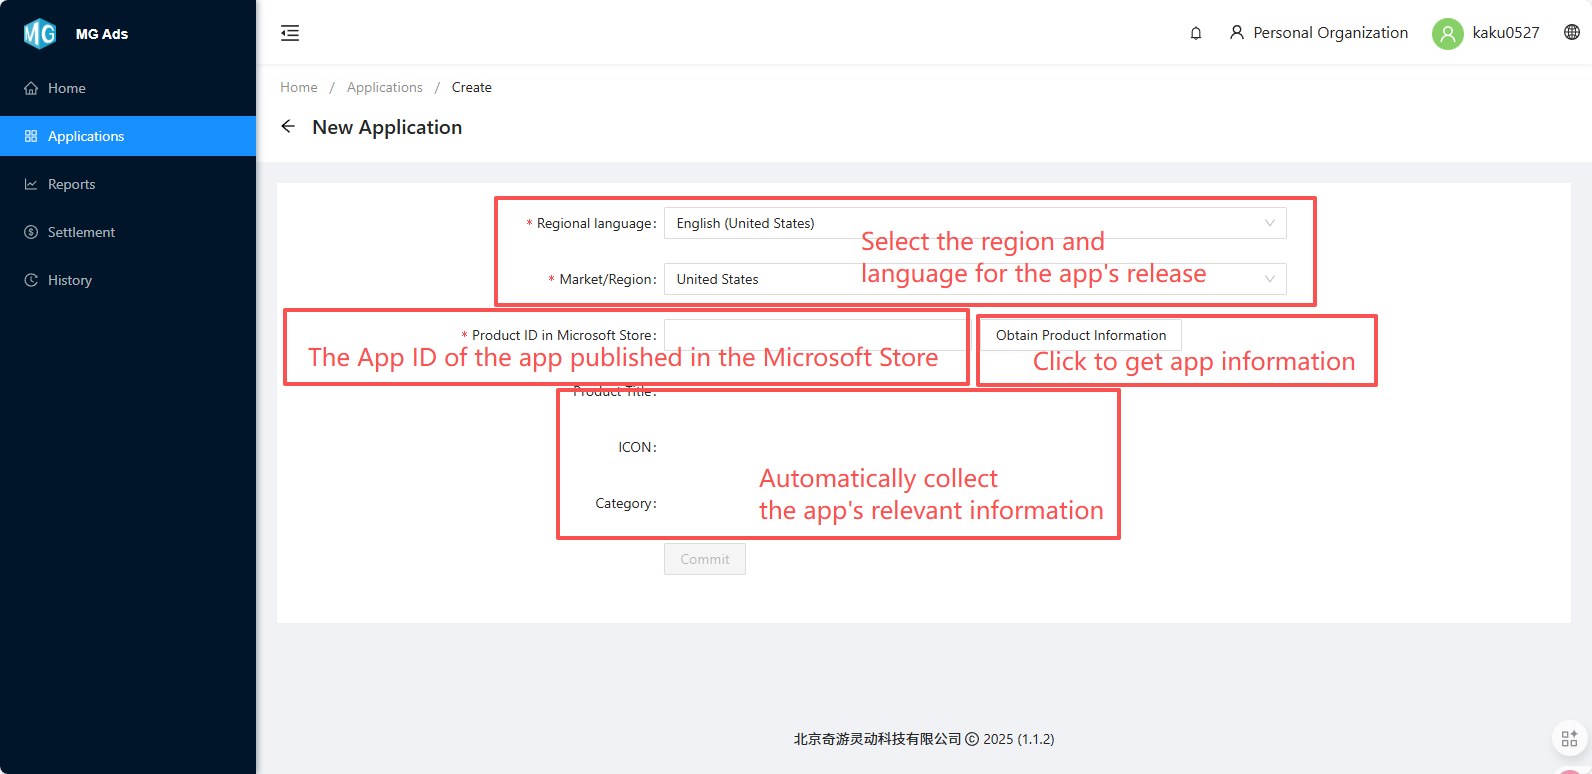
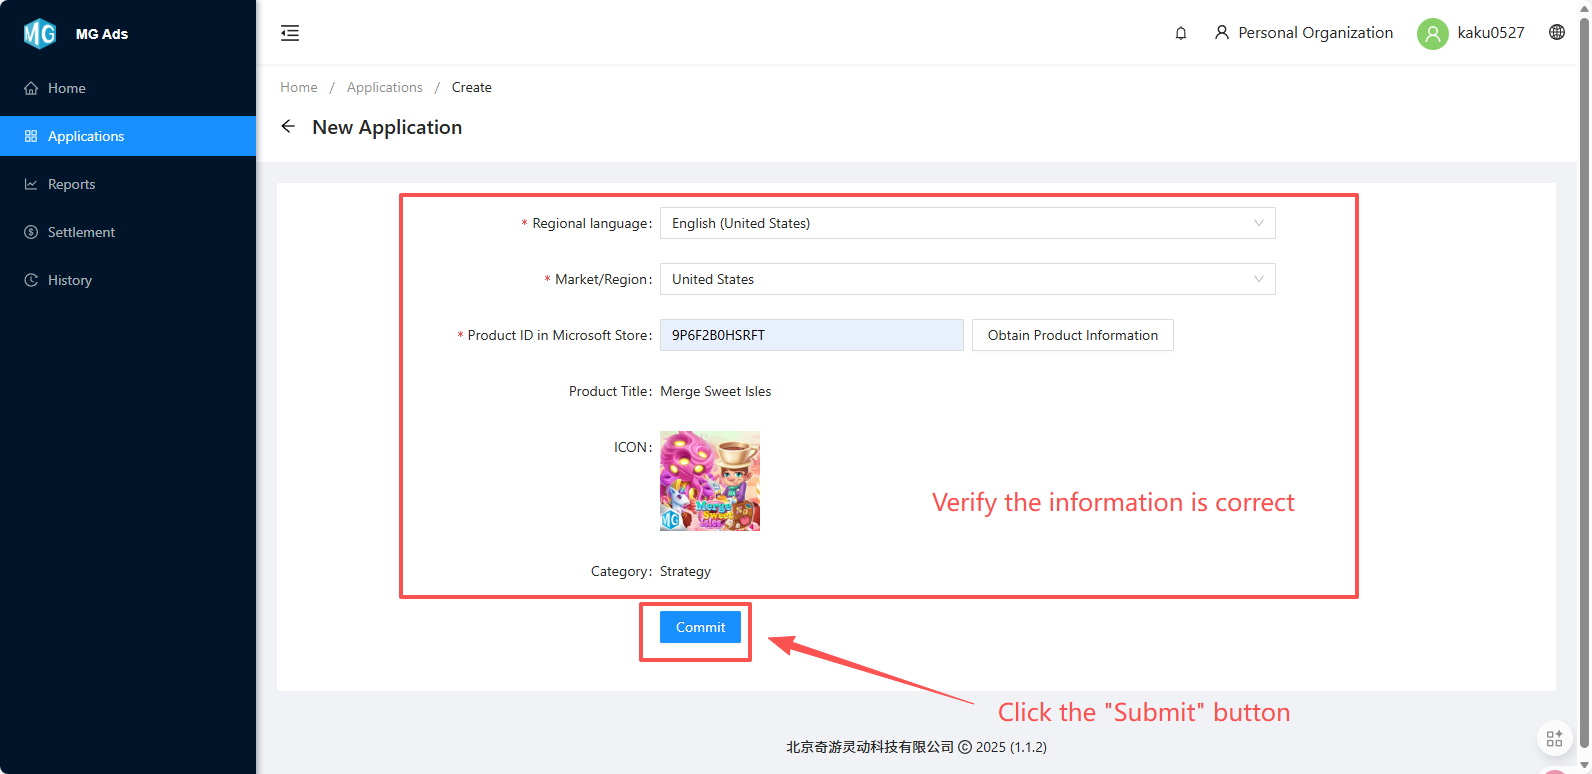
Step 4: Enter the new application creation page, scroll down, select the region/language where the app is published, fill in the Microsoft Store ID, click the "Get App Info" button, wait for information collection, confirm the information is correct, and click Submit.
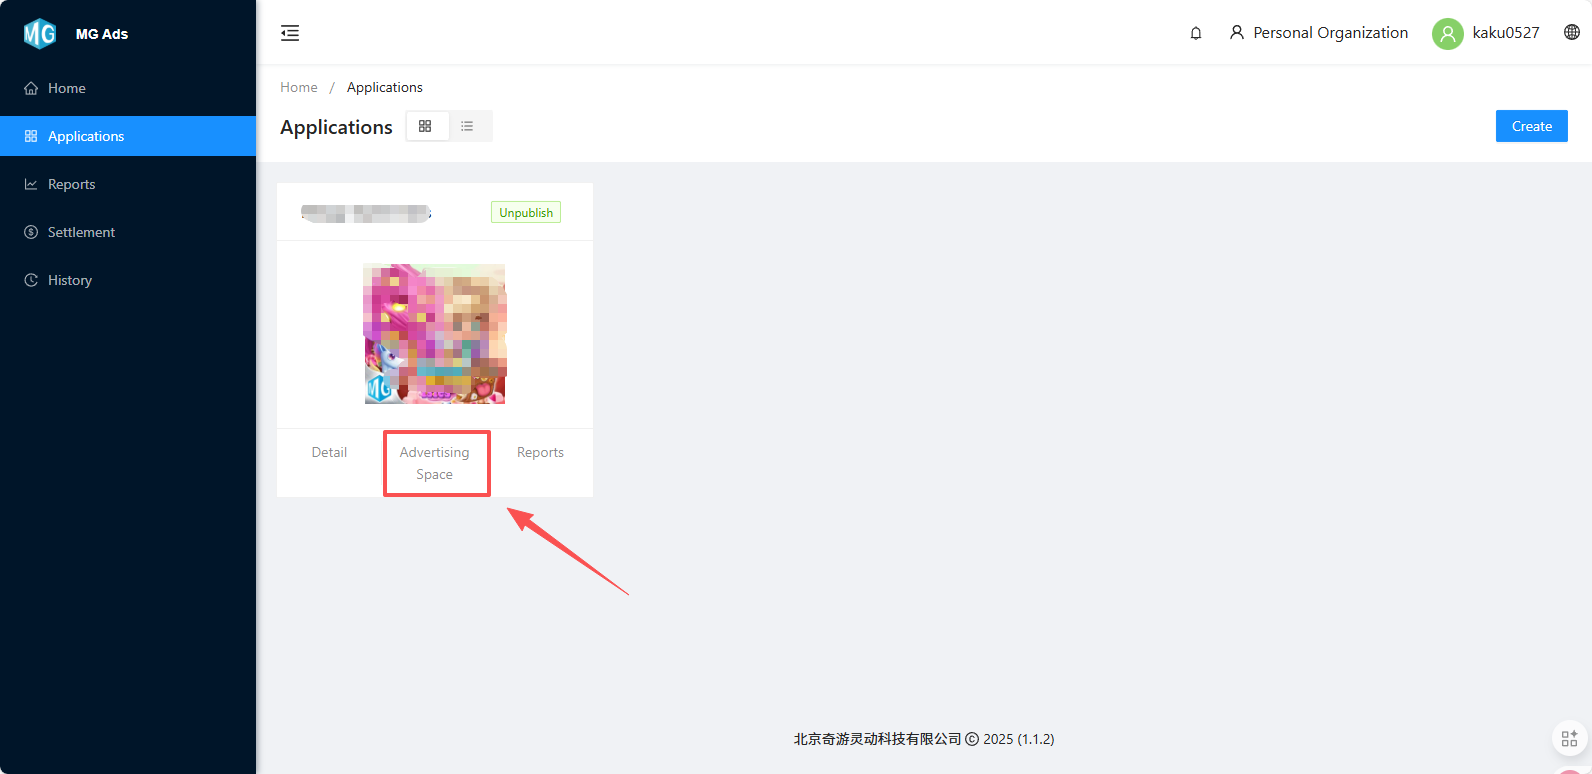
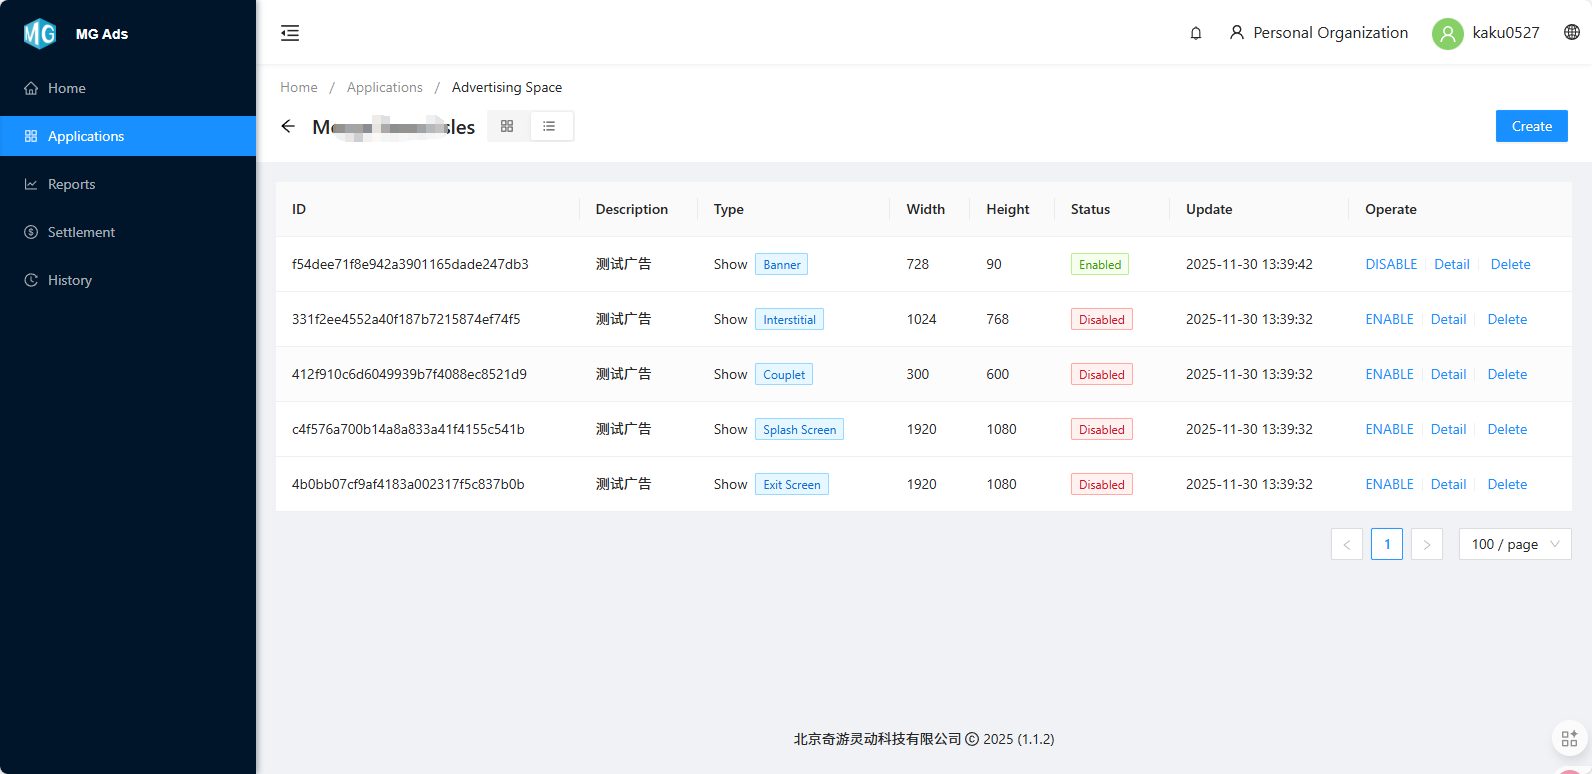
Step 5: After submission is complete, enter the Application Management interface - click the "Ad Placements" button.
Step 6: Enter the Ad Placements page, click "Create Ad Placement."
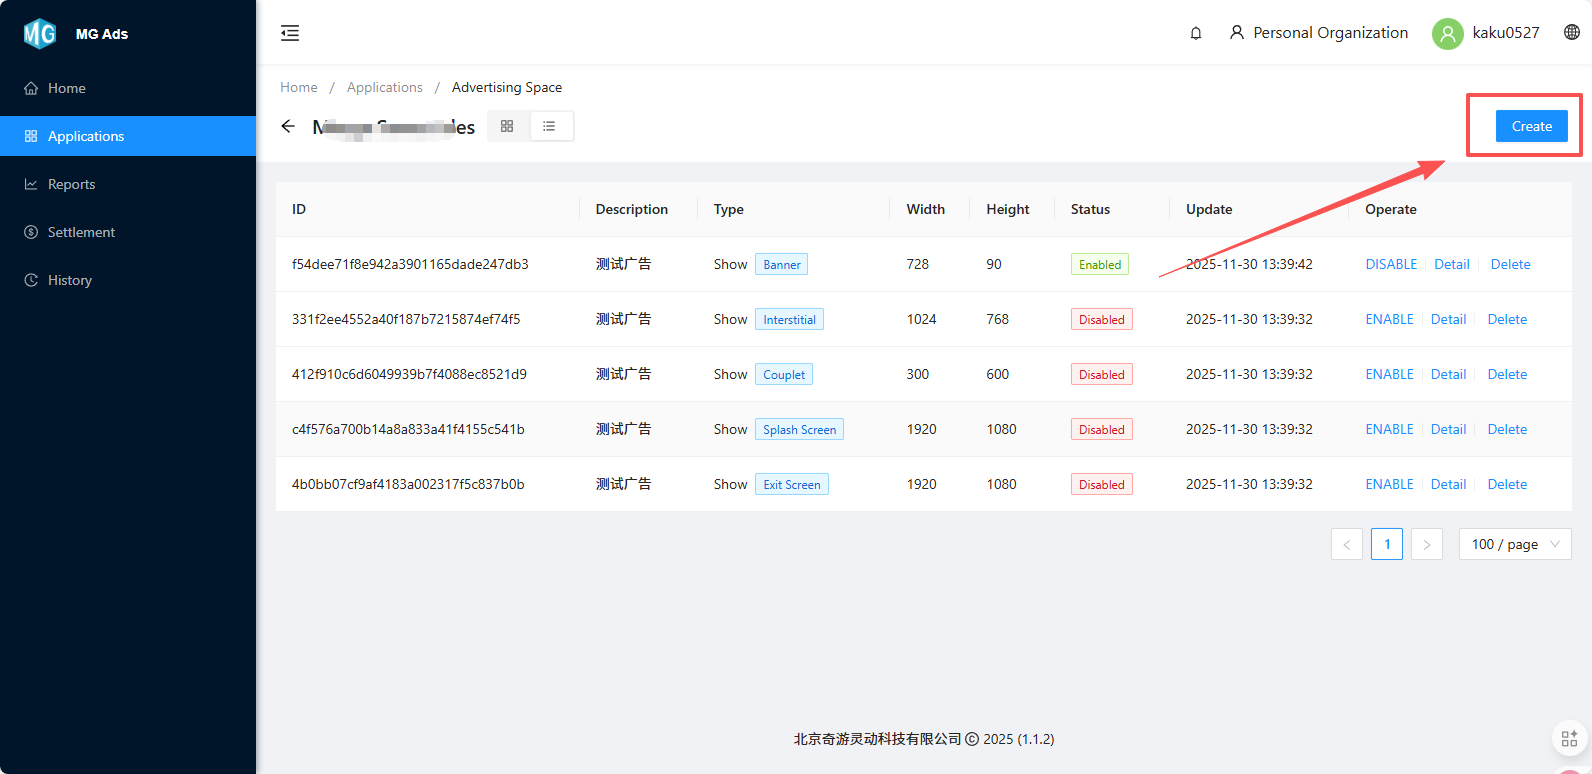
Step 7: Fill in and select the required ad type and size.
Description: Edit a custom name for easy identification and management of this ad placement.
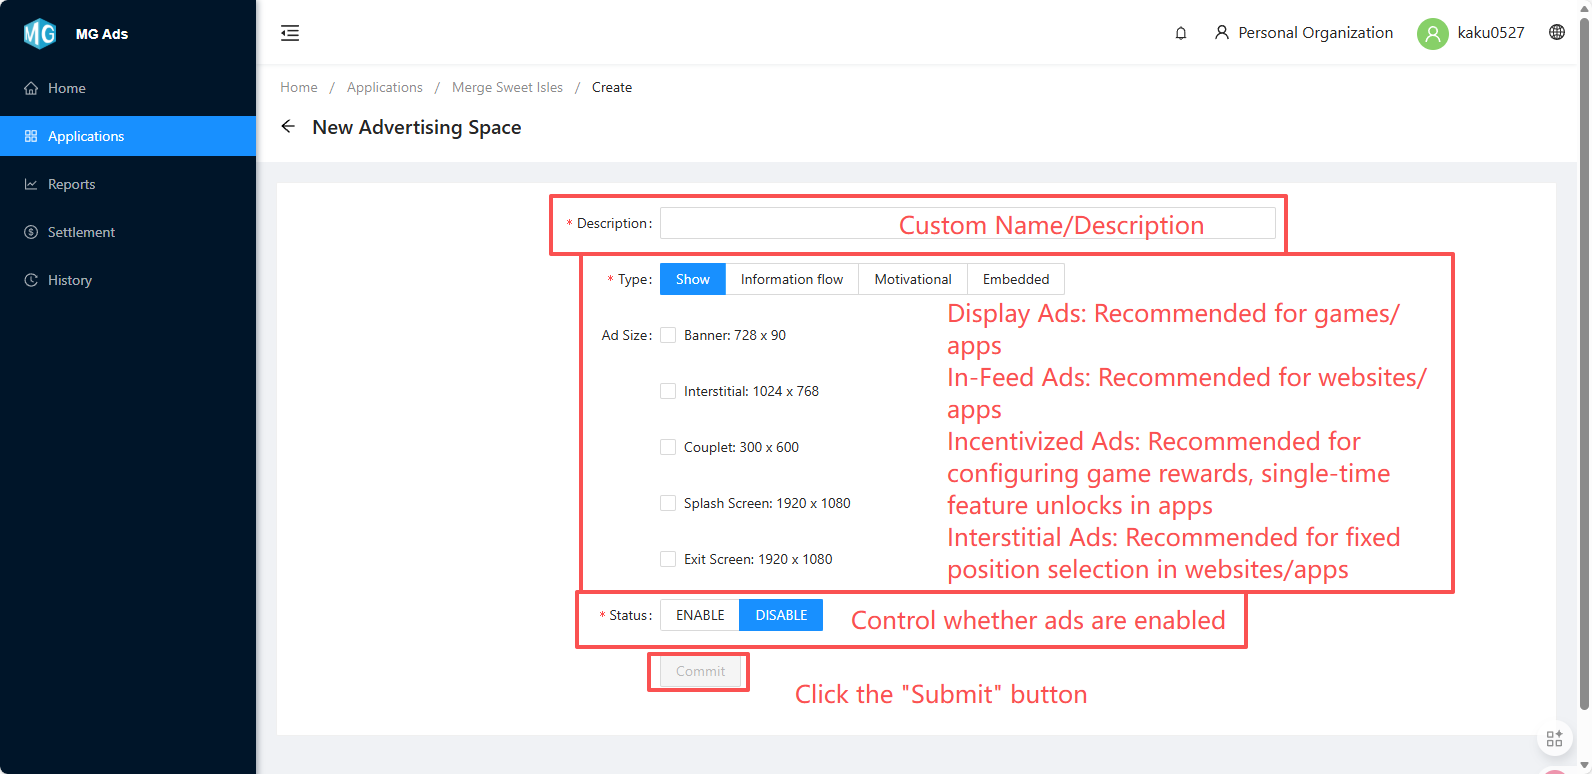
Note: Please display ads in a way that does not impact or ideally enhances the user experience, based on your own product.
Step 8: Creation Complete.
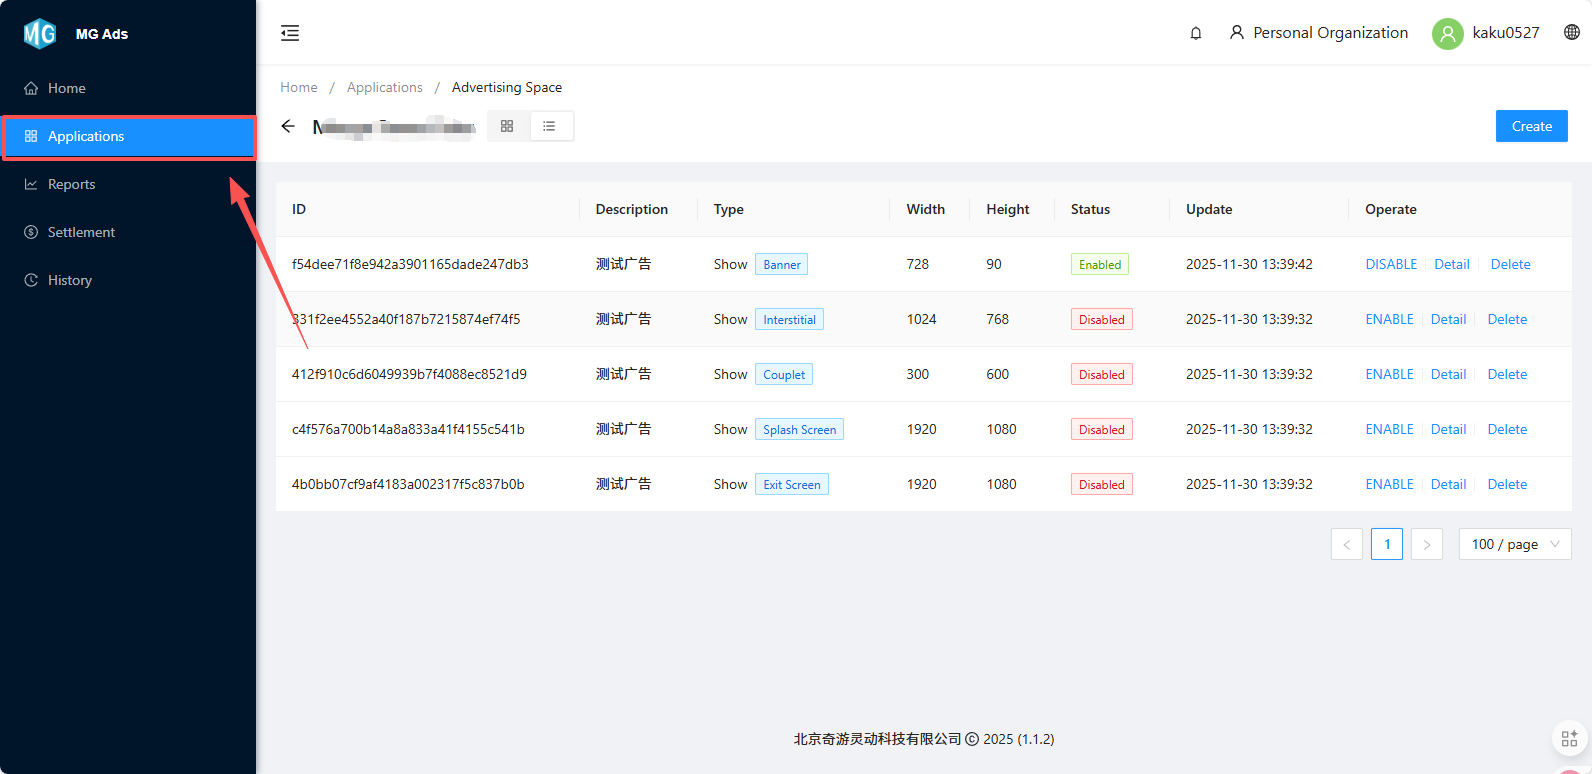
Step 9: After creating the ad placement, return to the Applications tab.
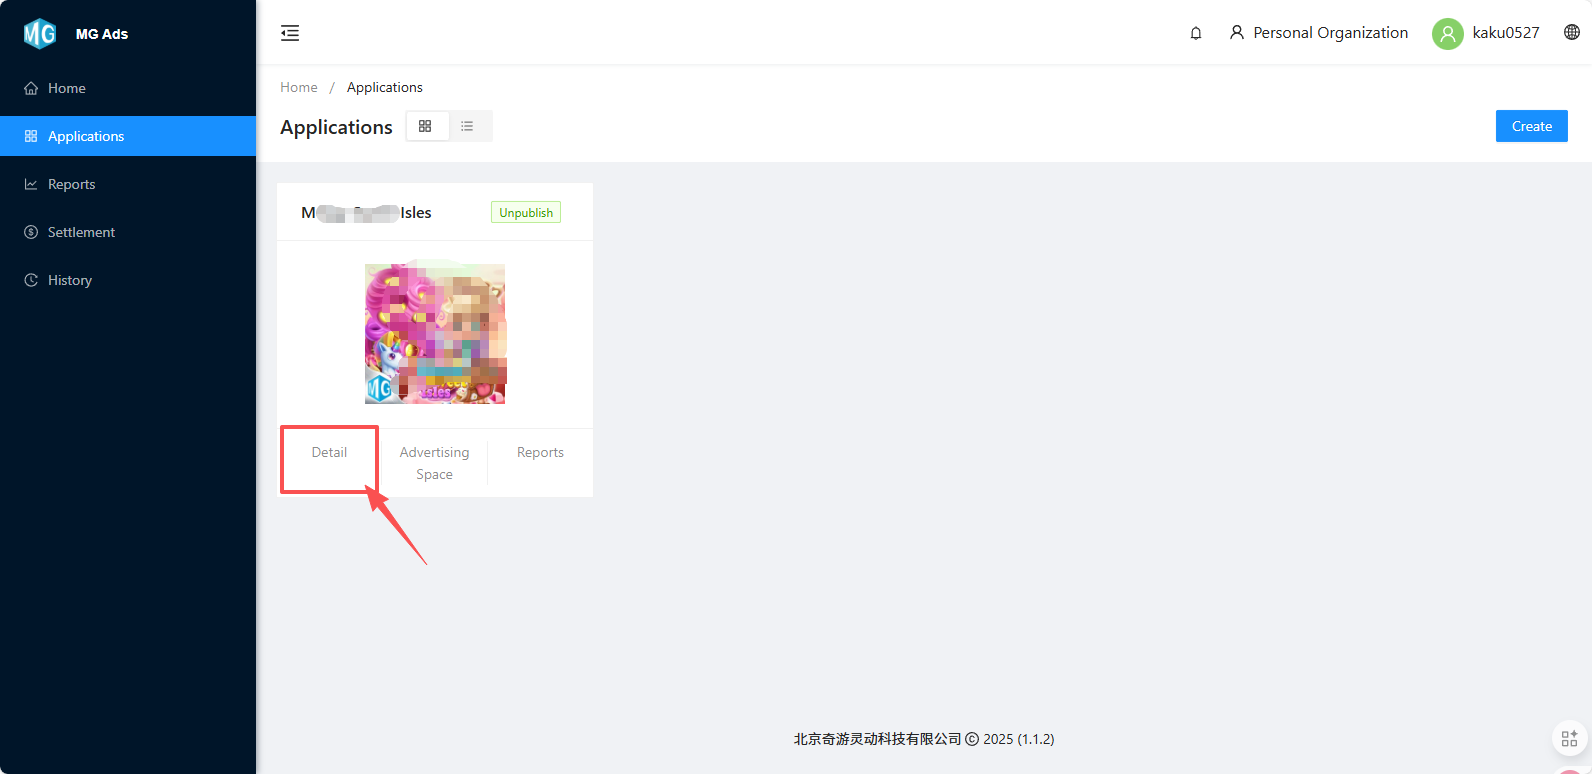
Step 10: Click the "Details" button under the product.
Step 11: Enter the details page, review the information again for correctness, click the "Submit for Review" button, and wait for administrator review.
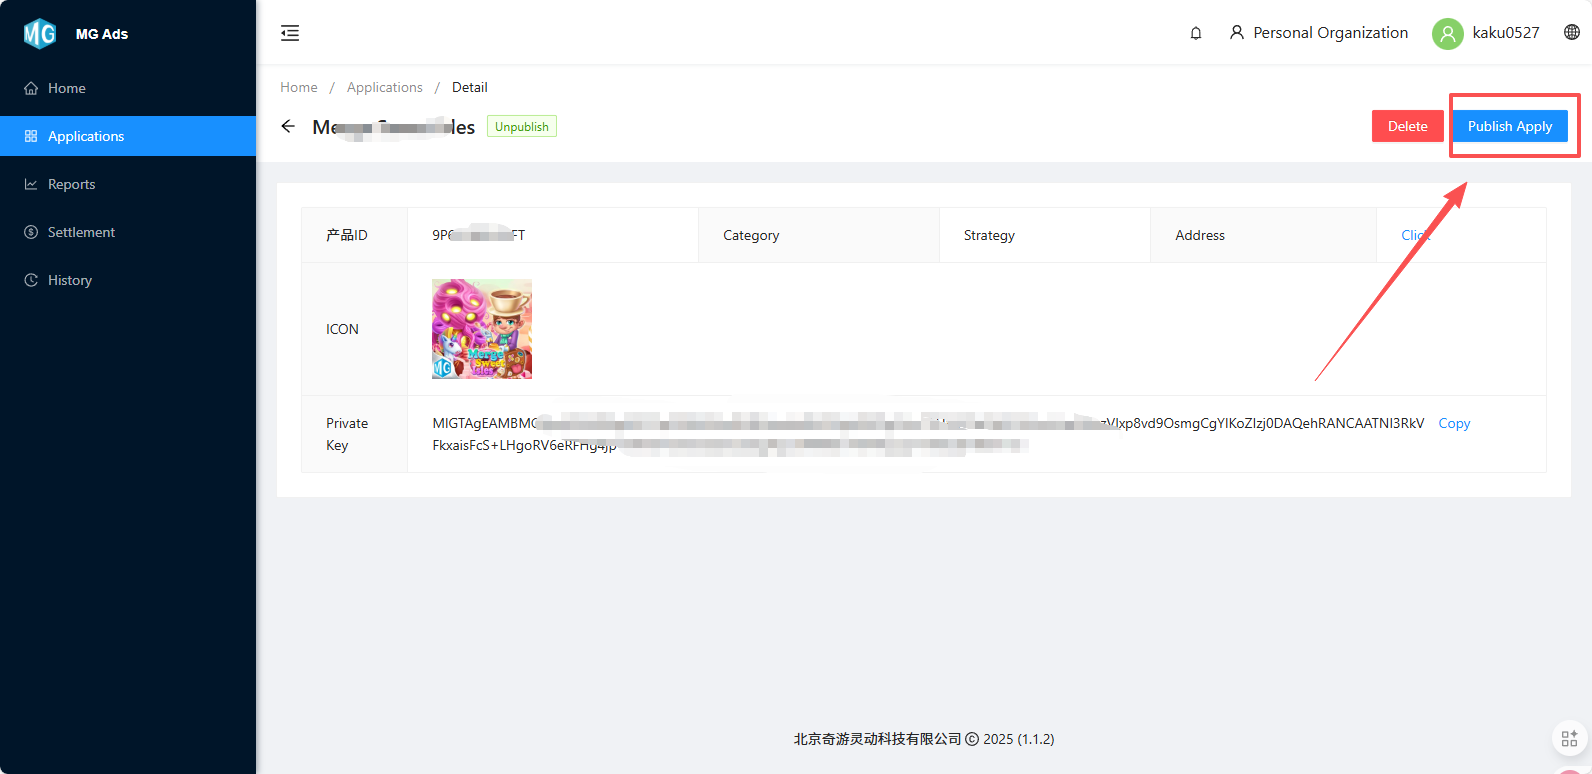
Step 12: Receive feedback on review status from operations/business/email.
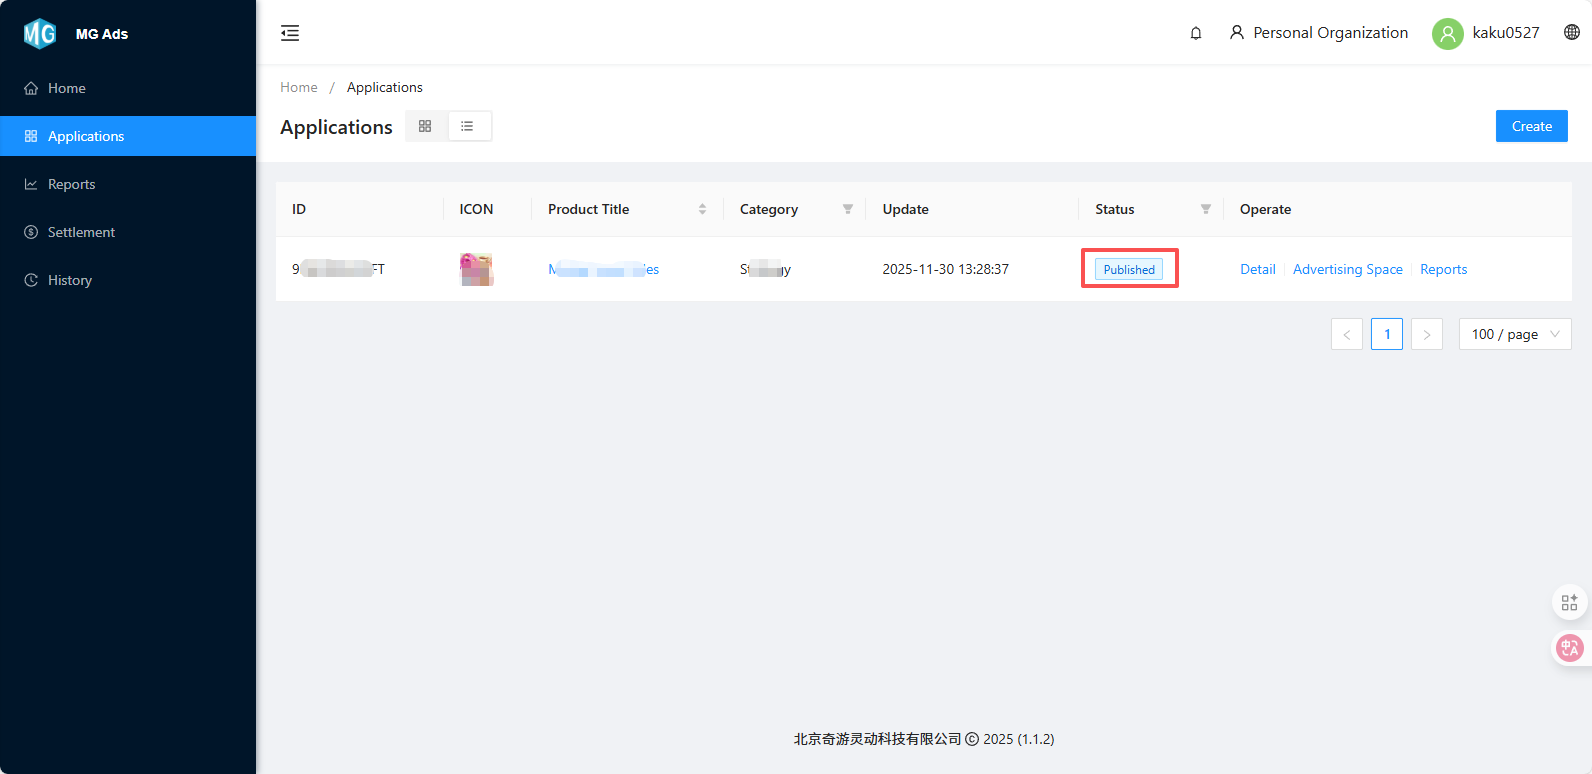
The page displays the status as approved.
Step 13: After approval, please publish a new version to the Microsoft Store.
Ad Integration
Step 1: Download the Miracle Games SDK
Download the SDK suitable for your development environment from the MG official platform. [Documentation]
Step 2: Initialize the SDK
During application development, perform initialization on the downloaded SDK at an appropriate initialization stage to ensure proper functioning of the advertising features.
Step 3: Insert Ad Code in the Application
After creating Splash, Banner, Interstitial, Skyscraper, Full-screen Interstitial, and Exit Screen ad placements in the MG backend, insert the ad code at the relevant locations within the application. For details, please refer to [Advertising SDK Selection and Integration].
Step 4: Testing and Integration
Ad Reports and Payment Settings
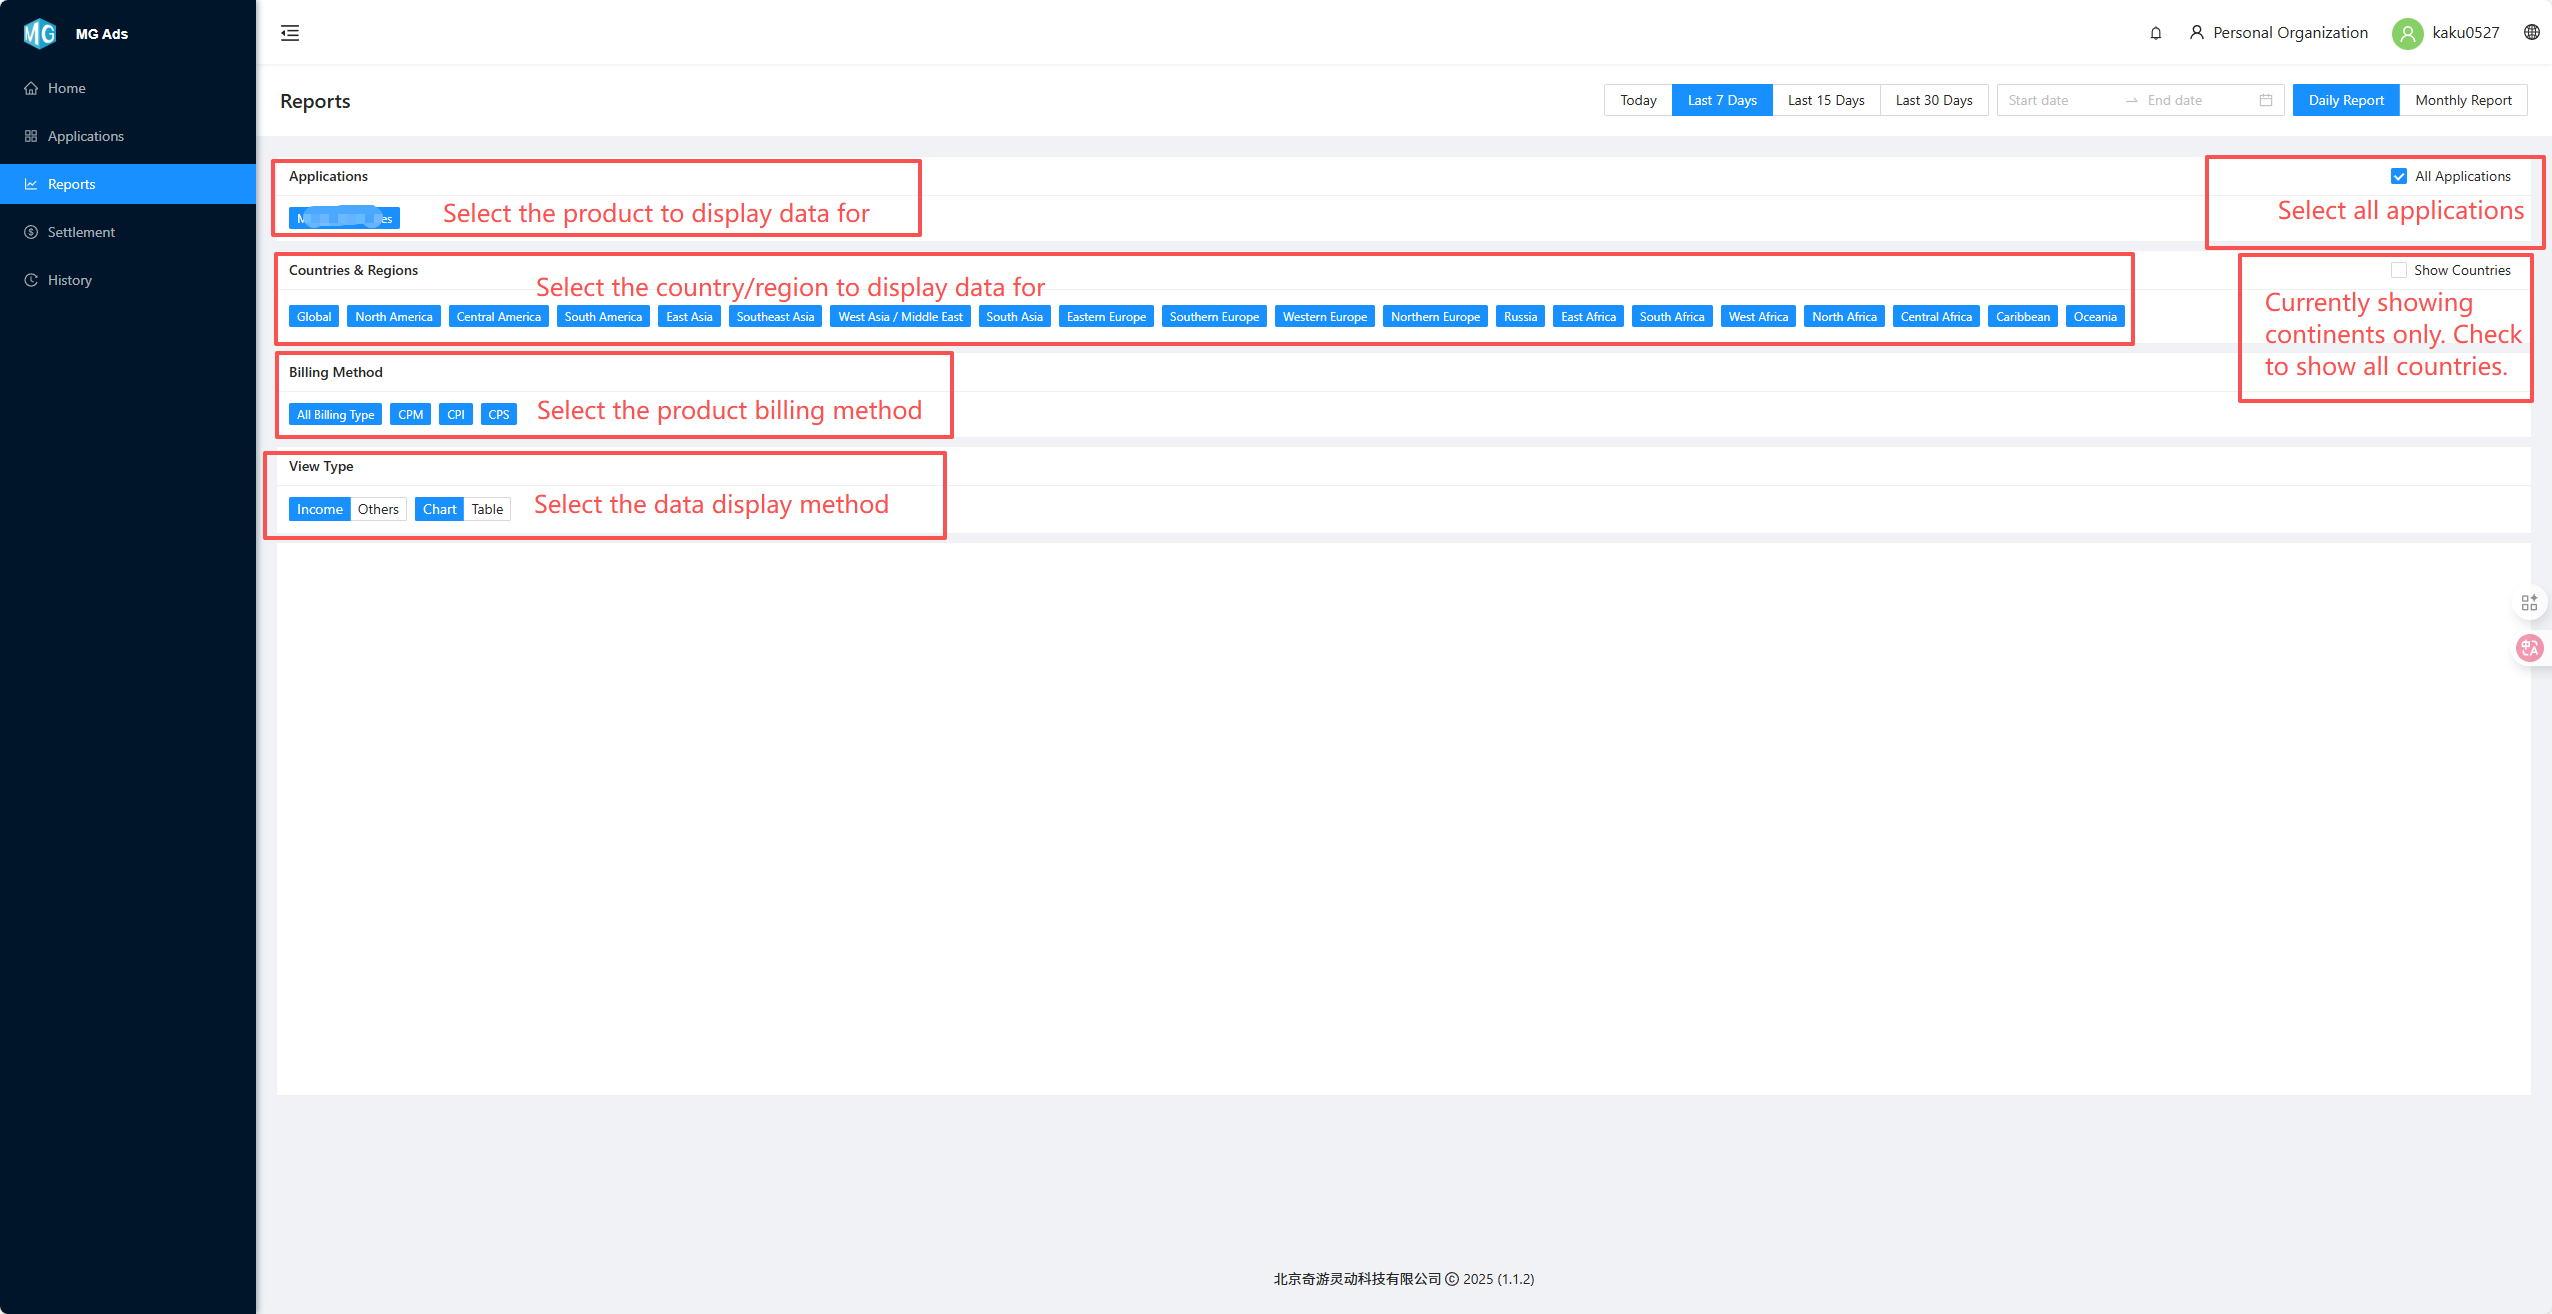
Ad Reports
In the MG backend, you can view advertising data for your application. This data helps developers understand important metrics such as ad impressions, clicks, revenue, etc., to optimize advertising strategies.
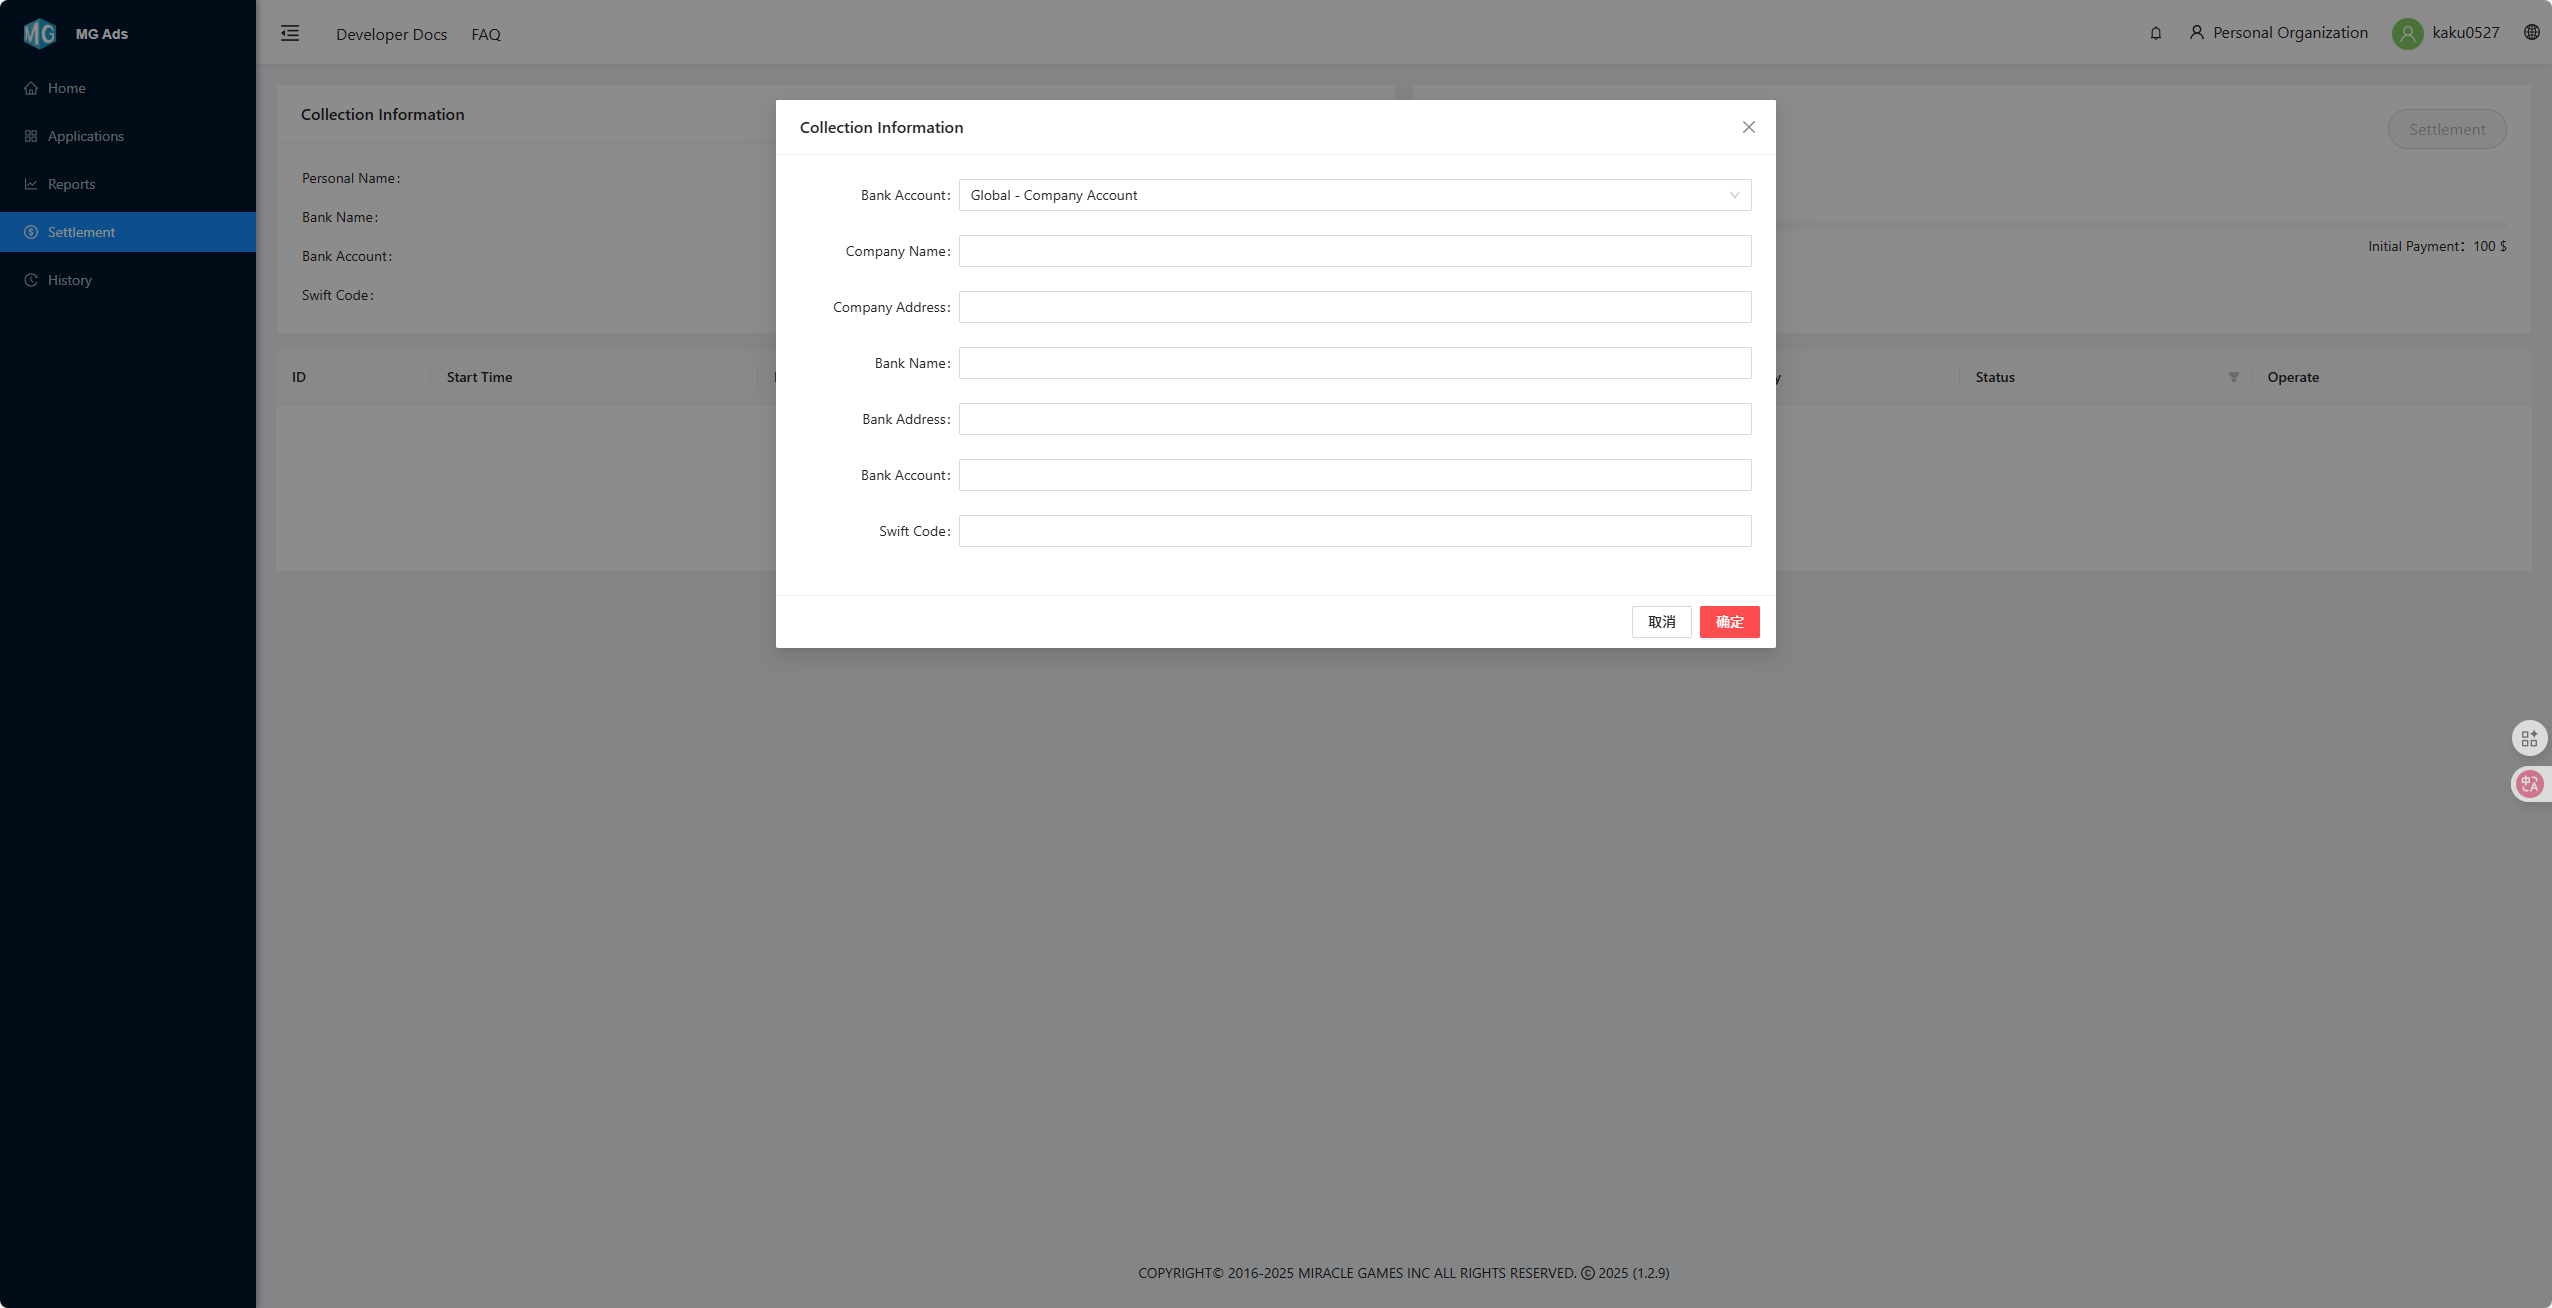
Payment Settings
Enter the "Set Financial Information" page.
Fill in personal or corporate financial information to ensure accurate and timely settlement of advertising revenue.
Personal Information Entry:
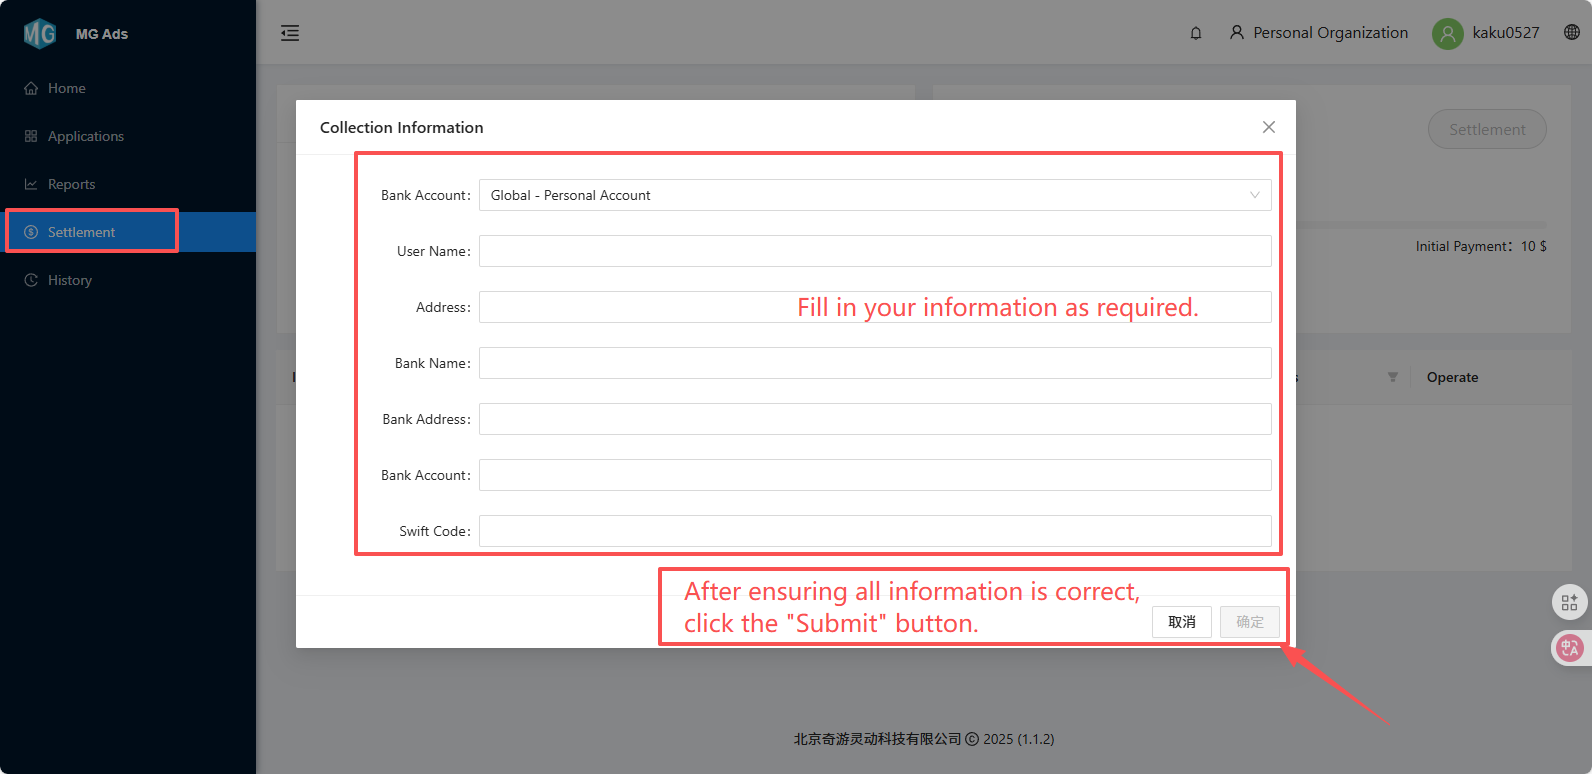
Payment information must be filled out completely and correctly.
Company Information Entry: